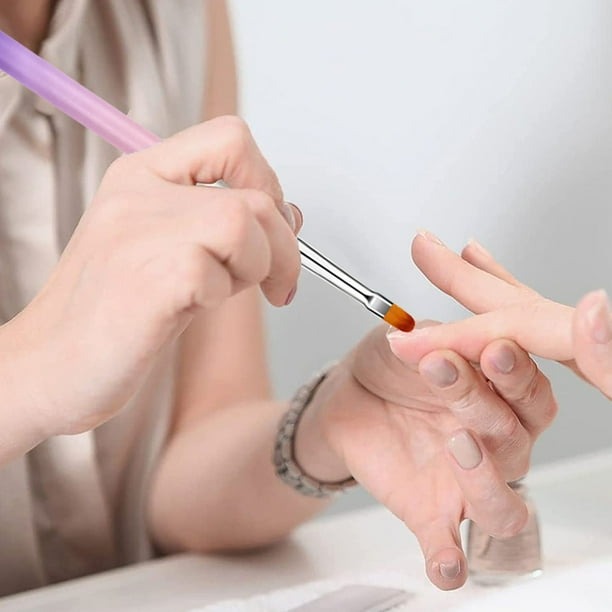
Introduction to Gel Nail Brush Maintenance
Maintaining gel nail brushes is crucial for any nail artist. Clean brushes are the key to creating flawless nail art designs. They ensure that each stroke delivers the perfect amount of gel. Plus, well-maintained brushes last longer, saving you money and reducing waste. In this guide, we’ll cover the essentials of keeping your gel nail brushes in top shape. From the must-have cleaning supplies to best practices, we’ve got you covered. Let’s dive into the world of gel nail brush care and learn how to clean gel nail art brushes effectively.
Essential Cleaning Supplies for Gel Nail Brushes
To keep your gel nail brushes in prime condition, you’ll need the right cleaning supplies. Let’s go over the essentials:
- Alcohol or Brush Cleanser: Alcohol, particularly 70% to 90% isopropyl alcohol, is a go-to for removing gel residue. A specialized brush cleanser works well, too.
- Lint-Free Wipes: These are crucial for a gentle yet thorough cleaning process.
- Clear Gel: A base coat or builder gel can help clear gel from the bristles.
- Dappen Dish or Small Bowl: Useful for holding liquid cleaners during the cleaning process.
- Lint-Free Towel: Handy for drying and shaping the brushes after cleaning.
Remember to choose the right cleaner based on your brush type. Natural hair brushes might be damaged by harsh chemicals like acetone, while synthetic brushes can generally handle stronger solutions.
Deep Cleaning Process for Post-Application Cleanup
Engaging in a deep cleaning process after using your gel nail brushes is essential. This detailed cleansing prevents the buildup of gel residue, which can affect the performance and lifespan of your brushes. Here is how to effectively clean your gel nail art brushes post-application:
- Start with the Right Solvent:Use 70% to 90% isopropyl alcohol or a professional brush cleanser suited for gel residue. These solvents break down the gel effectively without harming synthetic brush fibers.
- Use Lint-Free Wipes:Gently press and wipe the bristles against a lint-free wipe soaked in the solvent. This step removes the initial layer of gel from the bristles.
- Clear Gel Method:Dip the brush into a clear base coat or builder gel. This process helps to encapsulate and pull out any remaining gel particles deep within the brush bristles.
- Wipe and Reshape:After thoroughly cleaning the brush in the clear gel, gently wipe it again with a lint-free wipe. Reshape the bristles carefully to maintain their form and ensure smooth future applications.
- Dry and Store:Once clean, let your brushes dry on a lint-free towel. Ensure they are completely dry before storing to prevent mold or deterioration.
This deep cleaning process will not only keep your gel nail art brushes in excellent condition but also ensure the high quality of your nail art designs. Remember, taking the time to maintain your brushes will enhance their performance and extend their lifespan significantly.
Routine Cleaning Between Color Applications
Maintaining pristine condition of gel nail art brushes during a manicure session is vital. Preventing color mix-ups ensures the quality of your work. In this segment, we’ll focus on routine cleaning practices between color applications, using proper supplies and techniques.
- Wipe off excess gel: Start by gently but firmly wiping the brush on a lint-free wipe to remove surface gel.
- Dip in clear gel: Swirl the brush in clear gel, like a base coat, to extract deeper residue.
- Clean removal: Swipe the brush across a lint-free wipe again, removing the clear gel along with any lingering color.
- Reshape bristles: Use your fingers to shape the brush back into its original form.
- Dry thoroughly: Let the brush air dry before proceeding to the next color to avoid diluting the gels.
Repeat this quick-cleaning method after working with each color. It’s effective and it saves time. By keeping to a strict routine cleaning schedule, you not only protect your gel nail art brushes but also create a seamless color transition for intricate designs. Remember, care for your brushes between every color switch for the best results.
Best Practices for Caring and Extending the Lifespan of Nail Brushes
Proper care increases your gel nail brushes’ lifespan and ensures peak performance. To help you with this, here are best practices to follow:
- Avoid Direct Sunlight: Store brushes away from sunlight and UV light to prevent the gel from curing on the bristles.
- Use the Right Cleaners: Steer clear of harsh chemicals like acetone, especially on natural hair brushes. Stick to gentler options like isopropyl alcohol.
- Cap the Brushes: Always replace caps after use to keep out dust and other contaminants.
- Handle With Care: Be gentle during cleaning to avoid damaging the brush fibers or causing them to fray.
- Don’t Soak Bristles: Quick dips in cleaning solutions are enough. Extensive soaking can lead to bristle damage.
- Reshape After Cleaning: Use your fingers to shape the brush after cleaning, ensuring it retains its original form.
- Dry Properly: Before storing, let brushes dry completely to avoid mold or damage from moisture.
These simple steps can greatly extend the usable life of your gel nail art brushes, allowing for consistent quality in your nail art designs.
Tips for Storing Gel Nail Brushes Properly
Proper storage of gel nail brushes is key to their longevity and performance. Here are practical tips to ensure optimal storage:
- Use Protective Caps: Always place caps on brushes after use. This protects bristles from dust and damage.
- Avoid Direct Light: Store brushes away from sunlight and UV light. Direct exposure can cause the gel on brushes to cure.
- Dry Brushes Completely: Ensure brushes are fully dry before storing to prevent mold and deterioration.
- Separate Storage: Keep gel nail brushes separate from other tools. This prevents contamination and damage.
- Vertical Storage: Store brushes vertically if possible. This preserves their shape and prevents bending of the bristles.
- Clean Before Storing: Clean brushes thoroughly using the methods outlined before placing them in storage. This keeps them ready for the next use.
- Controlled Environment: Store in an environment with moderated humidity and temperature. An overly humid or hot setting can damage the brushes.
Implementing these straightforward storage techniques can greatly extend the life of your gel nail brushes, ensuring they remain in good condition and perform well in every application.
Recognizing When to Replace Your Gel Nail Brushes
Proper care and maintenance of gel nail brushes can significantly extend their lifespan. However, even with meticulous cleaning and storage, there comes a time when you need to recognize that your gel nail brushes are due for replacement. Here’s what to keep an eye out for:
- Frayed Bristles: Check for signs of fraying. If the bristles start to spread out irregularly, it’s time for a new brush.
- Loss of Shape: A well-shaped brush is essential for precise nail art. If you can’t reshape your brush after cleaning, consider getting a replacement.
- Difficulty in Cleaning: If gel residue no longer comes off easily, despite thorough cleaning, the brush may have reached its end.
- Stiffness in Bristles: Brushes lose flexibility over time. If the bristles remain stiff after cleaning, they won’t perform well.
- Quality of Work Suffers: When you notice your nail art isn’t as sharp or as clean as it used to be, your brush might be to blame.
These signs signal that it’s time to invest in new gel nail art brushes. Using worn-out brushes can compromise the quality of your nail designs, making it harder for you to achieve flawless results. Remember to retire old brushes properly and welcome new ones to continue providing top-notch nail art to your clients.
Final Thoughts on Keeping Your Gel Nail Brushes in Top Condition
Maintaining your gel nail brushes is crucial for any professional nail artist. Proper cleaning, caring, and storage are key to extending their lifespan and ensuring flawless nail art. Here are a few reminders:
- Regular cleaning prevents gel build-up and keeps the brushes in excellent form.
- Using proper cleaning supplies like alcohol or brush cleanser is essential.
- Always reshape the brushes after cleaning to maintain their effectiveness.
- Store brushes correctly, away from sunlight and in a dust-free environment.
- Know when to replace your brushes to maintain the quality of your art.
By following these steps, your gel nail brushes will serve you well, making every nail design perfect and pleasing to your clients.