Introduction to Gel Nails
Gel nails offer a modern twist on traditional manicures. Their endurance and shine make them a popular choice for those looking for long-lasting beauty. Below, we delve into the specific advantages of gel polish over conventional nail polishes.
Benefits of Gel Polish Over Traditional Nail Polish
Gel polish outshines regular nail polish in several ways:
- Durability: Unlike regular polish, gel polish withstands chips and cracks for several weeks.
- No Smudging: Gel polish sets quickly under a UV/LED lamp, reducing the risk of smudges.
- Shine: A high-gloss finish remains intact until you remove the gel polish.
- Protection: Gel nail polish adds a layer that helps protect your natural nails.
- Quick Dry Time: The curing process ensures gel polish dries faster than traditional polish.
With these benefits, it’s clear why gel polish is an excellent choice for durable, beautiful nails at home.
Essential Tools and Supplies for Gel Manicure
Getting the right tools is key for a perfect gel manicure. Here’s what you’ll need.
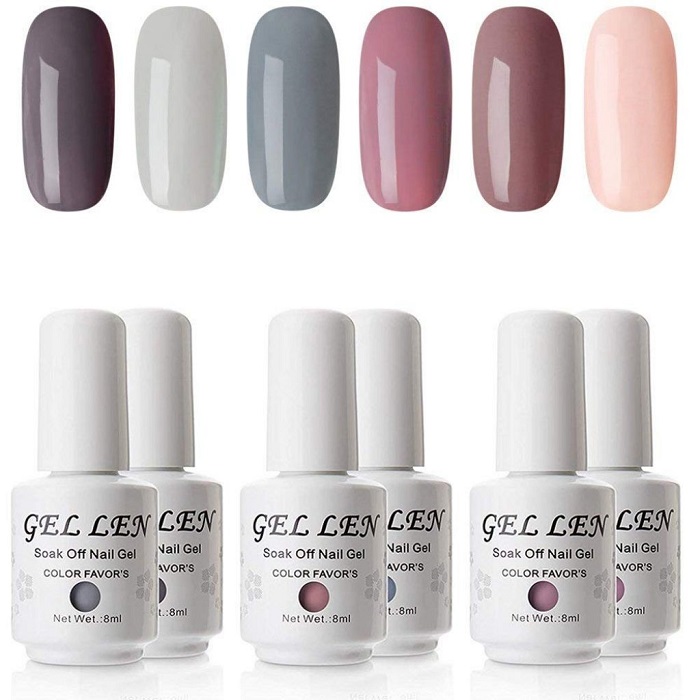
Choosing the Right Gel Polish Kit
Pick a gel polish kit with top-quality gels that won’t chip for weeks. Ensure the kit includes a UV/LED lamp, cuticle oil, pusher, nail buff, file, clippers, and acetone. Some kits come with extra goodies like gloves and nail decals.
Look for kits with both application and removal tools. This makes your job easier from start to finish. The brand of gel polish matters too. Better brands mean longer-lasting shine and color.
Importance of UV/LED Curing Lamps
A UV/LED lamp is essential. It hardens the polish, making nails durable. Lamps cure the polish fast so it won’t smudge or chip right away. This is how gel nails last long.
There’s a chemical reaction that happens under the lamp. It bonds the polish to your nails swiftly. Always use the lamp after each polish layer. Don’t skip this step.
Cuticle oil is a must-have, too. It keeps your skin and nails hydrated. Apply it daily for best results. Remember to get a nail buffer to smooth your nails. This helps the polish stick better.
You’ll also need a good base coat and top coat. These are crucial for long-lasting gel nails. The base coat helps polish bind to your nails. The top coat seals the color and adds gloss.
Pre-Manicure Nail Preparation
Nail prep is a must for a long-lasting gel manicure. It sets the stage for your polish, giving you professional results.
Step-by-Step Nail Shaping and Cuticle Care
Start by cleaning your nails with soap and water. Dry them well. Clip nails to the desired length and shape them with a file, moving in one direction to avoid splits. Push cuticles back gently with a cuticle pusher. Do not cut them, as this can lead to infection. Buff nails lightly to smooth the surface.
Importance of Nail Dehydration and Primer
Before applying polish, remove oils from nails. This makes sure the gel sticks properly. You can use a nail dehydrator for this. Follow with a primer to further improve polish adhesion and extend the life of your manicure.
Applying Gel Polish Like a Pro
Applying gel polish properly is essential for a manicure that looks great and lasts. Here’s how to do it like a pro.
Base Coat Application Techniques
Start with a clean, dry nail. Apply a thin base coat to avoid thick layers that can cause bubbling. Ensure full coverage, paying attention to the nail edges. Use smooth, even strokes for the best results. Cure the base coat under a UV/LED lamp as per the gel brand’s instructions.
Tips for Even Gel Color Application
Apply color in thin, even layers. Two to three layers usually suffice for an opaque finish. Start from the cuticle, pushing the polish towards the nail tip. Avoid the skin around the nails to prevent lifting. Cure each layer under the UV/LED lamp before applying the next. Fix any mistakes immediately, before curing, as gel polish hardens under the lamp.
Capping the Tips for Durability
After applying the color, cap the tips of your nails. This means painting the free edge of the nail to seal in the polish. This step combats chipping, extends the life of your manicure, and maintains the fresh look. After capping, cure the final layer under the lamp. Once you’re done, your nails are ready for a gel top coat to add shine and provide protection.
Gel Manicure Aftercare
Proper aftercare can extend the life of your gel manicure. Let’s explore how to keep your gel nails looking fresh.
Protecting Your Gel Nails From Chips and Peels
To prevent chips and peels, follow these tips:
- Avoid harsh chemicals and hot water which can weaken the gel.
- Wear gloves when cleaning or doing dishes.
- Don’t use your nails as tools to open cans or packages.
- Keep nails away from lotions and oils that can lift the polish.
- Seal the free edge of the nail during application to combat chipping.
Following these simple steps helps ensure your gel manicure remains flawless longer.
Daily Cuticle Oil Use and Its Benefits
Cuticle oil is vital for nail health. Apply it daily for maximal benefits:
- It keeps the skin around your nails supple.
- Helps protect nails from becoming brittle and breaking.
- Maintains moisture, especially after hand washing or sanitizing.
- Promotes healthy nail growth by nourishing the nail bed.
Remember, cuticle oil is crucial not only for gel nail maintenance but also for overall nail care.
Gel Polish Removal and Nail Health
Proper removal of gel polish prevents nail damage. This section provides steps and tips for safe at-home removal.
Safely Removing Gel Polish at Home
To safely remove gel nail polish at home, follow these simple steps:
- Start by Filing: Gently file the shiny top coat of the gel polish.
- Soaking Cotton Balls: Soak cotton balls in acetone.
- Wrapping Fingers: Place the soaked balls on each nail and wrap in foil.
- Waiting: Let nails soak for about 10-15 minutes.
- Gentle Removal: After soaking, the gel polish should peel off with ease.
If any polish remains, use an orange stick to remove it gently. Avoid scraping nails hard.
Caring for Nails Post-Removal
After gel polish removal, nail care is essential. Care for your nails this way:
- Moisturize: Apply cuticle oil to rehydrate nails.
- Nourishment: Use a nail cream daily. This keeps nails strong.
- Resting Nails: Give nails a break before the next gel application.
A nail health routine maintains strong, healthy nails after gel polish wear.
Advanced Gel Nail Techniques
After mastering the basics of gel nail application, you can elevate your manicure with advanced techniques. Incorporate nail art to express creativity, or combine gel polish with acrylic nails for added durability and length.
Incorporating Nail Art and Decals
Nail art and decals add a personal touch to your gel manicure. Begin with a clean gel polish base. Once the base coat is cured, position your decals carefully and press them onto the nail. Seal the decals with a gel top coat and cure it under the UV/LED lamp for longevity. Experiment with colors and patterns for a unique look.
For hand-drawn art, use a fine brush and gel paint. Apply art in thin layers and cure each layer as you go. This keeps the design sharp and prevents smudging.
Combining Gel Polish with Acrylic Nails
Gel polish can be applied over acrylic nails for a seamless finish. Prep the acrylic surface by buffing lightly to remove gloss. Cleanse with alcohol wipes, then apply a gel base coat. Proceed with gel polish application as you would on natural nails, curing each layer. Finish with a gel top coat for shine and protection.
When combining gel with acrylic, make sure to use compatible products to prevent lifting or damage to the acrylic underneath. Regular maintenance is necessary to keep acrylics in top shape, including filling regrowth every two to three weeks.