A perfect manicure can elevate your entire look. Nail polish adds a pop of color, sheen, and personality to your fingertips. But achieving a smooth, chip-free application can feel tricky. Fear not! This guide will walk you through the steps of applying nail polish like a pro.
Gather Your Supplies
Before you begin, collect everything you’ll need for a flawless manicure:
- Base coat
- Nail polish in your chosen color
- Top coat
- Nail polish remover (optional, for clean up)
- Cotton swabs
- Nail file
- Optional: Nail buffer, cuticle pusher, and hand lotion
Prep Your Nails
Prepping your nails is crucial for a long-lasting manicure. Here’s how:
-
Remove any old nail polish. Use nail polish remover to remove any leftover polish on your nails.
-
Shape your nails. Use a nail file to gently shape your nails to your desired length and form.
-
Gently push back your cuticles. Apply a small amount of cuticle oil (optional) and gently push back your cuticles with a cuticle pusher.
-
Buff your nails (optional). Buffing lightly can create a smooth surface for the polish to adhere to better. Wipe away any nail dust with a cotton swab.
Apply the Base Coat
Base coat creates a protective barrier between your nails and the polish. Here’s how to apply it:
Apply a thin layer of base coat to all your nails, including the tips.
Let the base coat dry completely according to the product instructions.
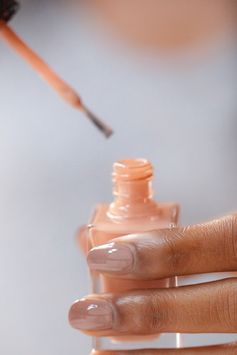
Apply the Nail Polish
Now for the fun part – adding color! Here’s how to achieve a smooth, even application:
-
Start with a clean brush. Wipe any excess polish off the brush before applying color.
-
Apply a thin layer of polish. Apply a thin coat of nail polish to each nail, starting in the center and then swiping outwards towards the sides.
-
Use three strokes for each coat. One stroke down the center, and one stroke on each side of the nail.
-
Let the first coat dry completely. This is important to prevent smudging.
-
Apply additional coats for opacity. Depending on the desired color intensity, apply one or two more thin coats of polish, following the same technique.

Clean Up Any Mistakes
Don’t worry if you make a small mistake. Here’s how to clean up:
-
Dip a cotton swab in nail polish remover.
-
Gently wipe away any excess polish on your skin.
Apply the Top Coat
Top coat adds shine and protects your manicure from chipping. Here’s how to apply it:
-
Once the final coat of color is dry, apply a thin layer of top coat to all your nails, including the tips.
-
Let the top coat dry completely according to the product instructions.
Moisturize and Enjoy!
Your beautiful manicure is complete! Apply hand lotion to hydrate your hands and keep your cuticles healthy.
Pro Tips for a Long-lasting Manicure
Here are some additional tips to extend the life of your manicure:
- Avoid using your nails as tools.
- Wear gloves when doing chores that can damage your nails.
- Apply a quick-drying top coat for extra protection.
- Touch up minor chips with a top coat to extend the wear.
With a little practice and these handy tips, you’ll be applying nail polish like a pro in no time!
Let Your Nails Breathe Between Applications
While it’s tempting to constantly refresh your manicure, it’s important to give your nails a break in between applications. Here’s why:
- Nail polish can be drying. Frequent application can dry out your nails and make them brittle.
- Breaks allow for natural nail growth. Taking a break from polish allows your nails to grow naturally and replenish moisture.
Here are some ideas for in-between breaks:
- Apply a clear strengthener. Clear strengtheners can help protect your nails and promote healthy growth.
- Moisturize your nails and cuticles. Regularly applying hand lotion or cuticle oil can help keep your nails hydrated and healthy.
- Embrace the natural look. Your natural nails can look beautiful too!
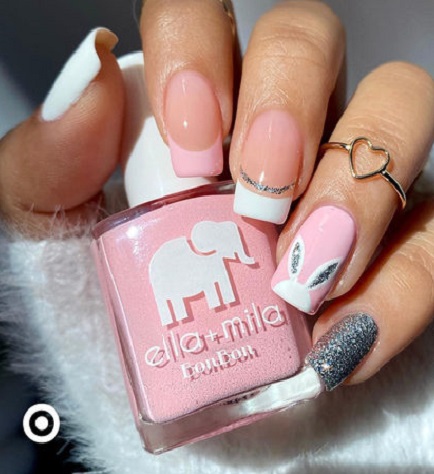
Express Yourself with Nail Art (Optional)
Once you’ve mastered the basic application, you can experiment with nail art designs! Here are a few beginner-friendly ideas:
- French manicure. This classic look features a pink or nude base coat with white tips.
- Polka dots. Use a toothpick or dotting tool to create playful polka dots on your nails.
- Stripes. Apply thin stripes of contrasting colors using nail art tape or a striping brush.
There are endless nail art possibilities online for inspiration. Remember, have fun and express your unique style!
Applying nail polish can be a fun and creative way to enhance your look. By following these steps and tips, you can achieve a beautiful, long-lasting manicure at home. Remember to practice patience and allow drying time between coats. With a little practice, you’ll be a nail polish pro in no time!
Choosing Your Perfect Polish Colors
Nail polish comes in a vast array of colors and finishes! Selecting the right shades can elevate your manicure to a whole new level. Here are some things to consider:
-
Occasion: Think about where you’ll be wearing your manicure. Bold colors might be perfect for a night out, while subtle tones might be more suitable for work or school.
-
Season: Many people love to coordinate their nail colors with the seasons. Bright, cheerful colors might feel right for summer, while deeper tones can complement fall and winter wardrobes.
-
Skin tone: Certain colors can flatter your skin tone more than others. Experiment and see what colors make your hands look radiant! If you’re unsure, cool-toned polishes tend to work well with cooler skin tones (pink undertones), while warm-toned polishes complement warmer skin tones (yellow or peach undertones).
-
Your style: Ultimately, the best color is the one that makes you feel confident and expresses your unique style! Don’t be afraid to experiment and have fun!
Drying: The Key to a Flawless Finish
Patience is key to a beautiful manicure! Here’s why drying time matters:
-
Prevents smudging: Applying subsequent coats before the previous layer is dry can cause smudging and ruin your hard work.
-
Ensures a smooth finish: Fully dry polish creates a smooth, even surface that looks polished (pun intended!).
-
Minimizes bubbles: Applying polish over wet layers can trap air bubbles, creating imperfections.