Top Acrylic Nail Design Trends for 2025
As we leap into 2025, the world of fashion sees acrylic nail designs blooming with fresh trends. Let’s explore the hottest styles set to dominate this year.
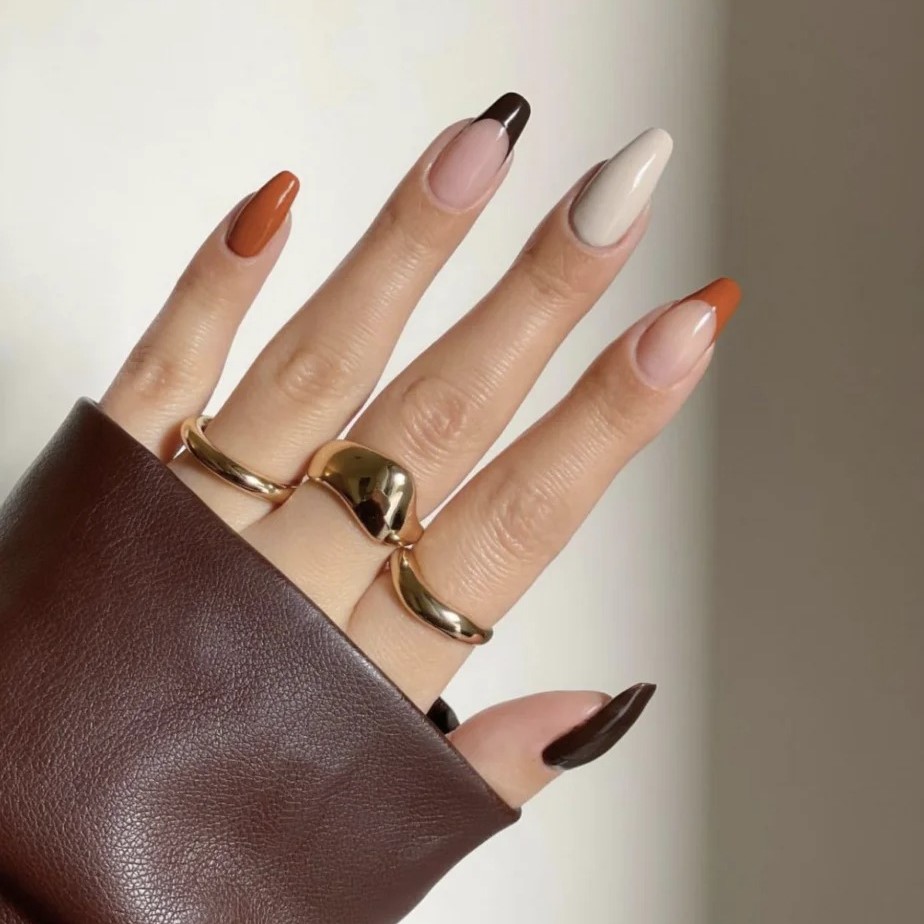
Bold and Vivid Colors
Gone are the days of shy pastels. Expect to see a surge in the use of bold, vivid colors. Neon shades, electric blues, and fiery reds will make your nails stand out.
Geometric Patterns
Clean lines and shapes bring a modern twist. Triangles, circles, and stripes in contrasting colors will catch the eye and set a geometrical trend.
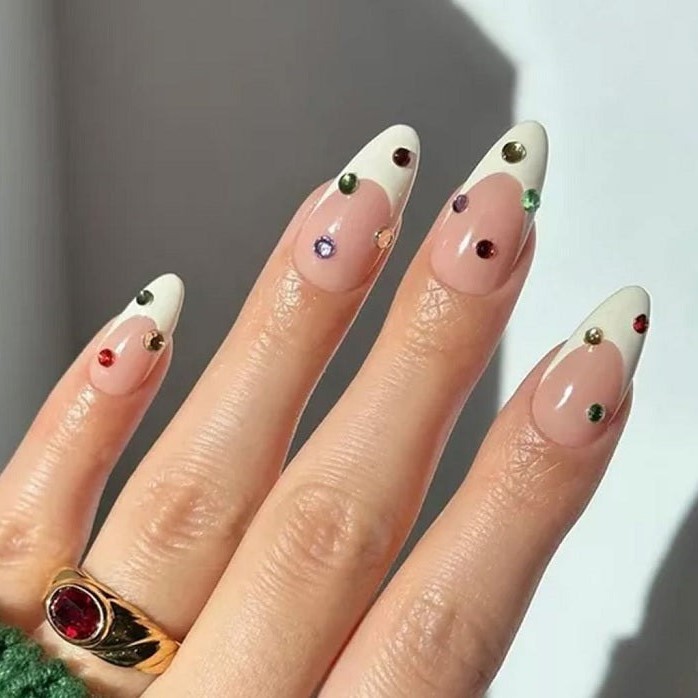
3D Nail Art
Three-dimensional nail art continues to soar. From tiny gemstones to intricate flowers, these designs add an exciting texture to your nails.
Mixed Media Manicures
Creative minds will love mixed media manicures. Combining different materials like foils, glitter, and fabrics will push the boundaries of traditional acrylic nail designs.
Minimalist Designs
For those who love simplicity, minimalist designs emerge strong. Think single lines, dots, or a splash of color on an otherwise bare nail. It’s simple yet striking.
Matte Finishes
Matte finishes give a sophisticated touch. They are perfect for those seeking a sleek, no-shine look.
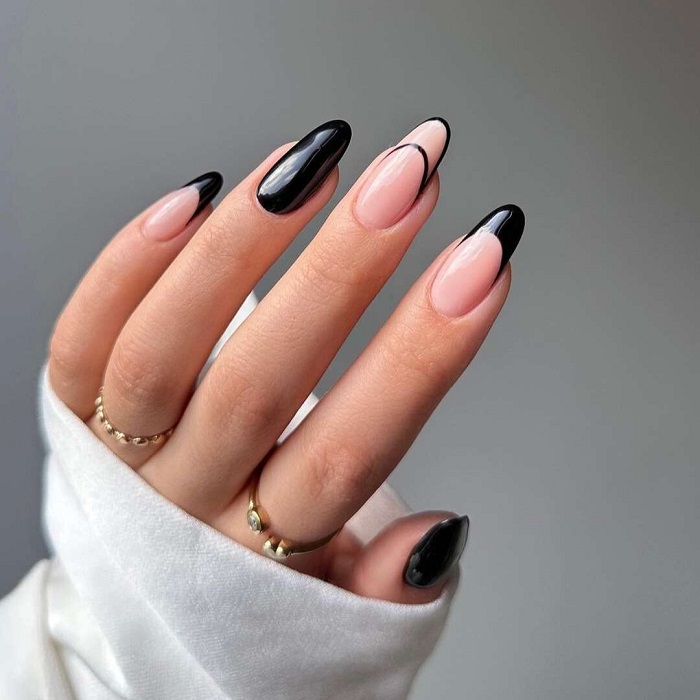
Long Stiletto Shapes
Long, pointed stiletto nails remain a favorite for drama and elegance. They elongate the fingers and provide a canvas for bold designs.
Pressed Flowers
For a natural touch, pressed flowers encapsulated in acrylic are blooming in popularity. They offer a romantic, delicate aesthetic.
The year 2025 brings a mix of daring, artistic, and refined acrylic nail designs. Remember to consider your personal style when choosing from these trends. Your nails are a canvas for self-expression, and these designs are here to inspire.
Essential Tools and Supplies for Creating Acrylic Nails
To get started with acrylic nail designs, you need the right tools and supplies. Here’s what you will need:
Acrylic Nail Tip Sets
These sets provide the base for your nails. They come in various sizes to fit each nail perfectly.
Acrylic Powder and Liquid Monomer
Mix these to create the acrylic that will form over your nail tips. They should be high quality for best results.
Nail Brushes
You’ll need brushes in different sizes for applying acrylic and creating designs. Make sure they are specifically for use with acrylics.
Nail Files and Buffers
Files shape the nails, while buffers smooth the surface before and after applying acrylic.
Primer and Dehydrator
These prepare the natural nail surface for better adhesion of the acrylic. They help prevent lifting and enhance durability.
Cuticle Pusher
A cuticle pusher is essential for prepping the nail by pushing back the cuticle gently.
Nail Glue
Nail glue is used to attach the nail tips securely onto your natural nails.
Acrylic Nail Clippers and Scissors
For adjusting the length and shape of the nail tips before applying the acrylic.
Top Coat and Base Coat
A base coat protects your natural nails, while a top coat gives a glossy finish to the acrylic nail designs.
Invest in quality tools and supplies to ensure your acrylic nails look great and last long. As you become more skilled in creating acrylic nail designs, you can explore more specialized tools. Start with these essentials and let your creativity flow!
How to Choose the Right Shape for Your Acrylic Nails
Choosing the right shape for your acrylic nails is vital. It can enhance your finger’s look and complement your style. Let’s dive into some tips to help you decide.
Consider Your Finger Shape
Look at your fingers. Are they long or short? Thin or wide? Different nail shapes suit different finger types. For example, oval or almond shapes can make short fingers appear longer.
Think About Your Lifestyle
Your daily activities matter. If you’re hands-on at work, go for shorter lengths and a rounded shape. They are less likely to snag or break.
Match with Your Style
Are you bold or minimalist? Stiletto or long coffin shapes appeal for dramatic looks. Squoval or classic round suit those who prefer subtlety.
Test Different Shapes
Try on different acrylic nail tip sets before you decide. It helps you see how they look on your hands. You can choose better this way.
Consult a Professional
A nail technician can offer advice tailored to you. They can suggest the best shape based on your nails’ natural shape and your preferences. Don’t hesitate to ask for help.
Remember, your comfort is key. Choose a shape that feels good and fits your lifestyle, and you’ll love your acrylic nail designs even more.
Maintenance Tips for Long-Lasting Acrylic Nails
To keep your acrylic nail designs looking flawless, follow these maintenance tips. They’ll help prolong the life of your nails and keep them looking as good as new.
Keep Hydrated
Moisturize your hands and nails regularly. Use cuticle oil and hand lotion to prevent dryness.
Wear Gloves for Protection
When doing chores, wear gloves. They shield your nails from harsh chemicals and water.
Avoid Using Nails as Tools
Don’t use your acrylic nails to open cans or remove staples. This can cause damage.
Schedule Regular Fill-Ins
Visit a nail technician every 2-3 weeks for fill-ins. This maintains the nails’ strength and beauty.
Be Gentle
Handle your nails with care. Avoid rough actions that might cause chips or cracks.
Keep Nails Clean
Wash your hands often and brush under the nails. This prevents dirt buildup and infections.
Monitor Nail Health
Watch for signs of lifting or infections. Seek professional help if you notice any issues.
Limit Exposure to Water
Too much water can weaken acrylics. Keep baths and showers short.
By adhering to these maintenance tips, your acrylic nail designs can last longer and stay in great condition. Your hands are sure to attract attention for all the right reasons!
Step-by-Step Guide to DIY Acrylic Nails at Home
Achieving salon-quality acrylic nail designs at home is easier than you think. Follow this simple step-by-step guide to create your own acrylic nails.
Gather Your Supplies
Before you start, make sure you have all the essential tools and supplies. Refer to the list provided in the essential tools and supplies section above.
Nail Preparation
Start with clean, dry hands. Push back the cuticles with a cuticle pusher. Apply dehydrator and primer to prep the nails.
Attaching Nail Tips
Select the correct size nail tips for each finger. Apply nail glue and place the tips on your natural nails. Be sure to press firmly for secure attachment.
Trim and Shape Tips
Use acrylic nail clippers and scissors to trim the tips. Shape them as desired with a nail file.
Mixing Acrylic
Follow the instructions to mix your acrylic powder and liquid monomer. The mixture should be a bead-like consistency.
Applying Acrylic
Dip your brush into the acrylic mix. Apply it to your nails starting from the cuticle area. Spread evenly to avoid lumps.
Filing and Buffing
Allow the acrylic to dry. File the nail to the correct shape and smooth the surface with a buffer.
Decorate Your Nails
Add color with polish or try some of the hot trends like bold colors or geometric patterns. Use your creativity!
Finishing Touches
Apply a top coat for a glossy finish. Allow your nails to dry completely. Use cuticle oil to keep your nails hydrated.
By following these steps, you can create stunning acrylic nail designs at home. Remember, practice makes perfect, so don’t get discouraged if it takes a few tries to get it right. Enjoy your beautiful, self-crafted acrylic nails!
The Dos and Don’ts of Acrylic Nail Care
Proper care ensures your acrylic nail designs stay stunning and last long. Here’s your quick guide to the dos and don’ts of acrylic nail upkeep.
The Dos:
- Moisturize Regularly: Keep your hands and nail area hydrated with lotion and cuticle oil.
- Wear Protective Gloves: Shield your nails when cleaning or gardening to avoid damage.
- Be Gentle with Your Nails: Treat your nails with care to prevent chips or snaps.
- Get Regular Fill-Ins: Maintain your nails’ beauty and strength by visiting a nail technician every few weeks.
- Keep Your Nails Clean: Wash hands often and use a soft brush for under the nails to keep them pristine.
- Monitor Nail Health: Watch for any lifting or signs of infection and consult a professional if needed.
The Don’ts:
- Avoid Harsh Chemicals: Limit your nails’ exposure to potent cleaning agents and acetone.
- Don’t Use Nails as Tools: Opening cans or picking at things can cause damage.
- Limit Water Exposure: Too much soaking can weaken the acrylic, keep baths brief.
- Skip Rough Treatment: Avoid actions that could lead to cracks or breakage.
- Neglect Signs of Trouble: If you notice any issues, seek professional help promptly.
By following these simple guidelines, your acrylic nail designs will keep turning heads. Remember, the longevity of your nails is in your hands!
Incorporating Nail Art and Accessories into Acrylic Designs
Acrylic nail designs allow for endless creativity. Adding nail art and accessories can transform your nails into a personal statement. Here’s how to incorporate these additions elegantly and creatively.
Choose Complementary Artwork
Select designs that enhance your nail color and shape. Think about balance and harmony. A little goes a long way with art.
Use Quality Stickers and Decals
Opt for good quality stickers and decals. They stick better and last longer than cheaper options. Align them carefully for a neat look.
Apply Tiny Gems or Stones
A few tiny gems can add sparkle. Use a dotting tool or tweezers for precise placement. Secure them well with a top coat.
Experiment with Glitter and Metallic Accents
Glitter or metallic strips make nails pop. Try them as a feature nail or in subtle accents. They catch light beautifully.
Incorporate 3D Elements Tastefully
Choose 3D elements like flowers or bows sparingly. One statement piece per hand is often enough. Position them thoughtfully.
Integrate Seasonal Themes
Match your acrylic nail designs with the season. Pumpkins for fall or snowflakes for winter can be fun. Change them as seasons shift.
Mix Textures for Contrast
Combine matte and glossy finishes. They can create an appealing contrast. Use texture with a purpose to maintain elegance.
By mixing nail art and accessories, you can take your acrylic nail designs to the next level. Remember, less is often more. Aim for a design that shows your style while remaining tasteful.
The Rise of Eco-Friendly Acrylic Nail Options
As concern for the environment grows, the beauty industry is evolving. Acrylic nail designs are no exception. Brands are now offering eco-friendly acrylic nail options. These alternatives aim to reduce the environmental footprint of nail art. Here’s what to expect with these greener choices:
- Biodegradable Packaging: Many companies are switching to recyclable or biodegradable packaging. This move reduces waste in landfills.
- Non-Toxic Formulas: Eco-friendly acrylics are free from harsh chemicals. They are safer for both the user and the planet.
- Sustainable Practices: Some brands now use sustainable practices in production. They aim to conserve water and energy. They also try to minimize emissions.
- Vegan and Cruelty-Free: Eco-friendly acrylics often carry vegan and cruelty-free labels. This means no animal testing and no animal-derived ingredients.
- Reusable Options: Reusable acrylic nails can be removed and applied again. This reduces the need for new sets and saves resources.
- Local Sourcing: Materials sourced locally cut down on transportation. This lowers carbon emissions tied to shipping.
Switching to eco-friendly acrylic nail designs is a responsible choice. It keeps nails looking great without harming the environment. As demand increases, more eco-friendly options are likely to appear. Keep an eye out for these sustainable trends while indulging in the latest acrylic nail designs.