Essential Tools for Nail Art Beginners
Starting your journey in nail art requires some essential tools. These tools will help you create diverse designs with precision and ease. The first and most basic tool you should have is a set of good quality nail polish brushes. Different sizes and shapes of brushes serve different purposes. Fine brushes help in creating intricate designs, while flat brushes are great for broad strokes.
A dotting tool is another must-have in your kit. It’s perfect for creating dots or small details, which are common in many nail art designs. A palette or a mixing tray is useful when you need to mix nail polish colors or dilute them with thinner. This helps in getting the right shade and consistency for your design.
High-quality nail polish in various colors acts as the canvas for your creativity. Including base coats and top coats in your essential tools will protect your nails and ensure the longevity of your artwork. Cleaning supplies such as cotton buds and nail polish remover are also important for correcting mistakes and achieving a neat finish.
Lastly, consider getting some embellishments like glitter, stickers, or gems for an added flair. These accessories can elevate your nail art and make it stand out. With these tools at hand, you can start practicing how to make nail art and eventually master the craft to express your style uniquely and boldly.
Preparing Your Nails for Art
Before you begin creating any nail art, proper preparation of your nails is crucial. This ensures that your designs last longer and look their best. Here are the steps to properly prepare your nails for art:
- Clean Your Nails: Start by cleaning your nails thoroughly. Remove any old polish completely using a high-quality nail polish remover. It’s important to have a clean surface to work on.
- Shape Your Nails: Once your nails are clean, shape them using a nail file. Whether you prefer square, round, or any other shape, make sure they are evenly shaped. Properly shaped nails serve as the best canvas for your designs.
- Buff Your Nails: Buffing your nails gently can remove any ridges or uneven surfaces. This step is important for a smooth application of polish and helps in how to make nail art look flawless.
- Apply Base Coat: A base coat helps to protect your nails from staining and adheres the polish better to your nails. Apply a clear base coat and let it dry completely. This also helps prolong the durability of the nail art.
- Hydrate Your Cuticles: Applying cuticle oil can help hydrate and nourish your nails and cuticles. Healthy nails are vital for intricate and detailed nail art designs. It makes the application process smoother and easier.
Preparing your nails with these steps will set a perfect stage for creating beautiful and lasting nail art designs.
Basic Techniques of Nail Art
Learning the basic techniques is key to mastering how to make nail art. These foundational skills allow you to create a variety of designs with confidence. Here’s what you need to know:
- Painting with Brushes: Understanding how to use different brushes is essential. Practice making straight lines, curves, and other shapes using fine brushes.
- Working with Dotting Tools: Use dotting tools for polka dots and small details. Adjust the pressure to control the dot size.
- Sponging: To achieve gradients or ombre effects, sponging is a great technique. Use a small piece of sponge to dab on different colors.
- Taping: Masking tape or special nail art tape helps create clean lines and shapes. Apply it on dry polish, paint over, and remove it carefully.
- Stencils and Decals: These tools help when precision is key. Apply decals for complex patterns or use stencils as a guide.
- Stamping: This method transfers designs from a plate to your nails. Be sure to practice aligning the stamps.
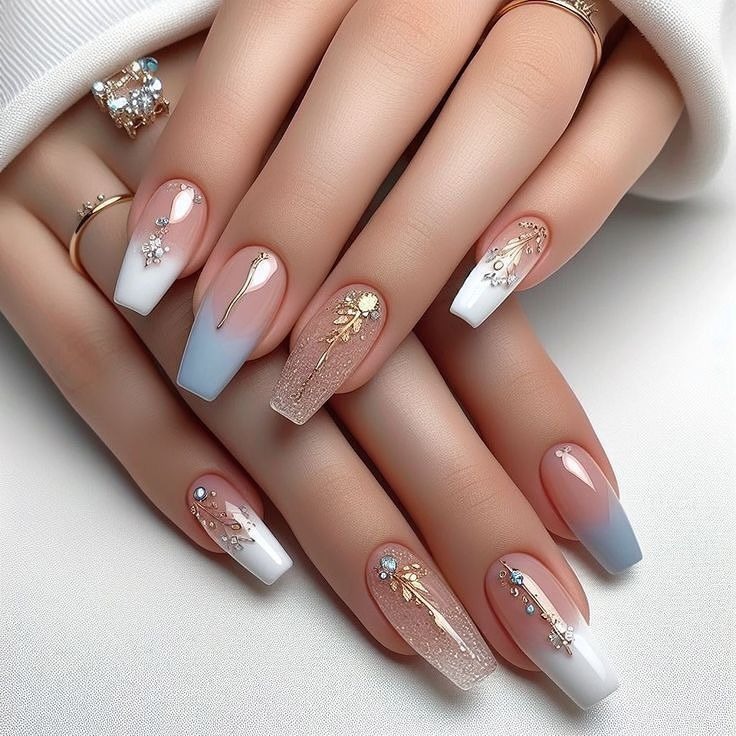
- Embellishing: Adding glitter, beads, or gems gives texture. Use a clear polish or special adhesive to secure them.
Master these techniques and you’ll be well on your way to creating stunning nail art. Practice regularly to refine your skills and experiment with different combinations. Next, we’ll explore some popular nail art design ideas that you can try.
Popular Nail Art Design Ideas
After mastering the requisite tools and techniques on how to make nail art, you’re ready to explore popular design ideas. Here’s a curated list of designs that are trending and can inspire your next masterpiece:
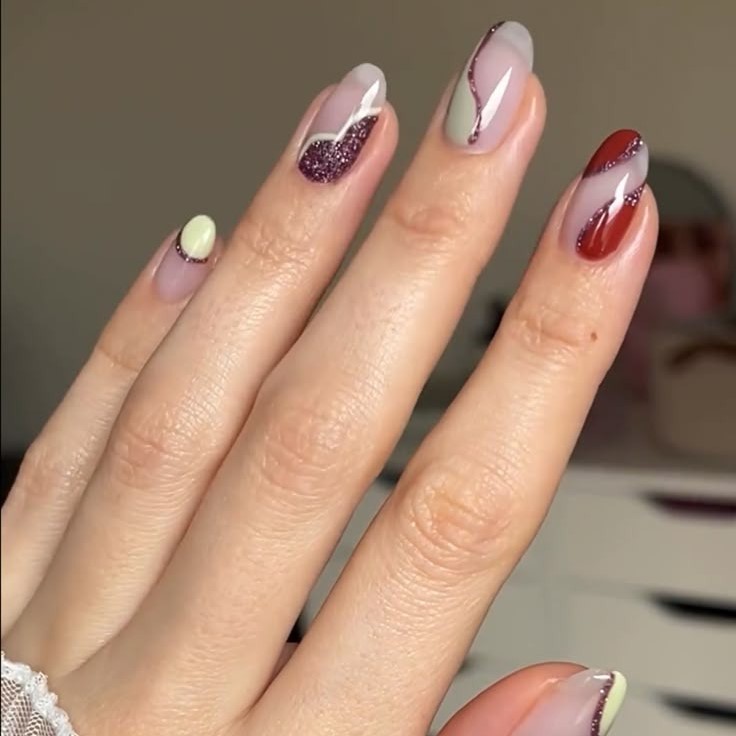
- Marble Effect: Use a toothpick or a fine brush to swirl different colors on your nails to create a marble-like pattern.
- Polka Dots: Employ your dotting tool to make evenly spaced or randomly scattered dots for a playful look.
- French Manicure with a Twist: Give the classic French manicure a modern spin by using colors or adding a tiny embellishment at the nail base.
- Stripes: Use tape as a guide to paint straight or diagonal stripes. You can mix colors for an eye-catching effect.
- Glitter Ombre: Gradually fade glitter polish from the tip of your nail downwards for a glamorous gradient.
- Geometric Patterns: Use stencils to create precise shapes and patterns. Experiment with different size combinations.
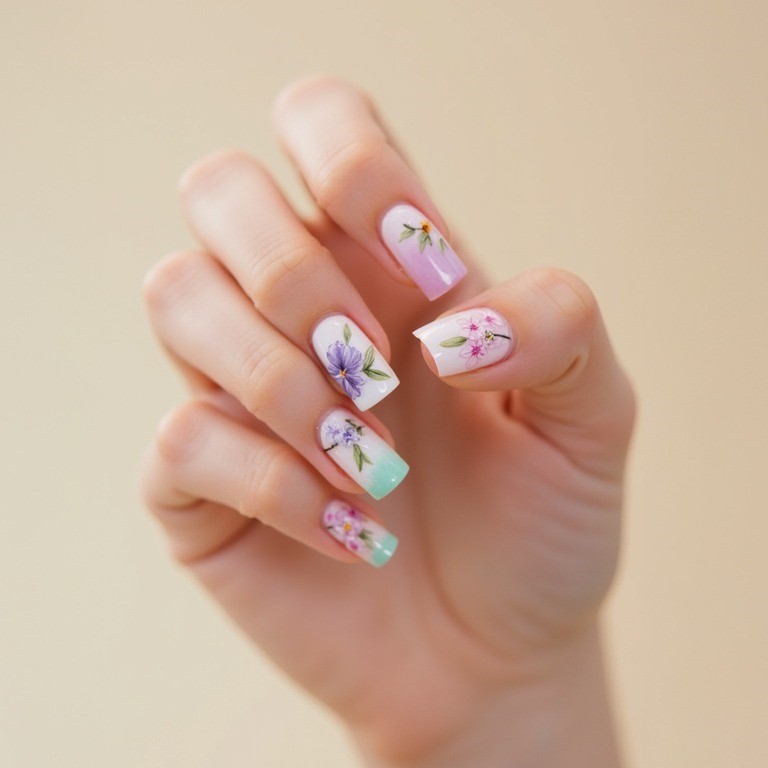
- Floral Designs: Draw simple flowers using a fine brush or stick on floral decals for an instant romantic vibe.
- Animal Prints: For something bolder, try replicating animal patterns like leopard spots or zebra stripes with fine brushes or stamping tools.
- Negative Space Art: Paint a design but leave part of the nail unpainted. Use tape to block out areas while you paint.
- Matte Finishes: Apply a matte top coat over any design for a sophisticated, contemporary look.
When exploring these nail art design ideas, remember to let each layer dry thoroughly before adding new details to avoid smearing. And most importantly, have fun with it! The beauty of nail art is in the creativity and personal expression it allows. Let these ideas inspire your designs and remember to share your creations to delight and inspire others likewise interested in how to make nail art.
Step-by-Step Tutorial for a Simple Nail Art Design
Creating a stunning nail art design is exciting. Here’s a step-by-step guide for beginners to follow:
- Choose Your Colors: Decide on a color scheme. Opt for contrasting colors for a pop or complementary shades for harmony.
- Apply Base Coat: Start with a clear base coat. This protects your nails and helps the polish adhere better. Let it dry.
- First Color Application: Apply your first color choice as the base of your design. Allow it to completely dry.
- Simple Design Elements: Using a fine brush, add simple shapes like dots or stripes onto the nail. A dotting tool can also create perfect dots.
- Add Details: Once the base design is dry, it’s time to add small details. Use a fine brush for precision.
- Top Coat Application: Finish with a clear top coat. This seals in your design and adds shine. Make sure every layer is dry before the next.
- Clean Up: Clean any polish off your skin using a brush dipped in nail polish remover.
- Let Nails Dry: Give your nails time to dry. Avoid touching anything until they’re fully hardened.
Follow these steps to make nail art that’s simple yet impressive. With practice, you can add complexity to your designs.
Advanced Nail Art Techniques for Seasoned Enthusiasts
For those who have mastered the basics, it’s time to delve into advanced nail art techniques. These methods require steady hands, creativity, and a willingness to practice. Here are some advanced techniques to elevate your nail art game:
- 3D Nail Art: This involves creating three-dimensional designs on your nails. Use acrylic or gel to sculpt miniature flowers, bows, or other shapes. Then, paint and attach them to your nails.
- Airbrushing: Airbrush machines spray a fine mist of paint. They create smooth gradients and detailed images. Stencils can help guide the designs you want to achieve. This technique requires an airbrush kit and some practice.
- Water Marbling: For this, you drop nail polish into water, creating a pattern. Then, dip your nail in and the polish adheres in a unique design. You may need to try several times to perfect this technique.
- Freehand Painting: If you have a steady hand and artistic skill, try painting detailed images directly onto your nails. This requires fine brushes and a lot of patience but allows for unlimited creativity.
- Using Nail Wraps: Nail wraps are thin adhesives that cover the whole nail. They come in countless designs and give a professional finish quickly. Just smooth them onto your nails and trim the excess.
- Reverse Stamping: Paint onto a stamping plate, not your nail. Then press the design onto the nail, resulting in a crisp image. This method is great for intricate and layered designs.
- Mixing Media: Incorporate unusual materials like foil, lace, or feathers into your art. Attach them with nail glue or embed them in gel for a dramatic effect.
By practicing these advanced techniques, seasoned enthusiasts can push the boundaries of what’s possible with nail art. Remember to keep refining your skills. And, enjoy the journey as you learn how to make nail art that turns heads and showcases your creativity.
Tips for Maintaining Your Nail Art
To keep your nail art looking fresh and lasting longer, consider these helpful tips:
- Avoid Water and Heat: Minimize exposure of your nails to water and heat. These elements can cause polish to lift or chip.
- Wear Gloves: When doing household tasks, wear gloves. This protects your nail art from harsh chemicals and abrasions.
- Moisturize Regularly: Keep your cuticles and skin around your nails moisturized. Use cuticle oil or a good hand cream.
- Seal the Edges: When you apply top coat, be sure to seal the free edge of your nail. This helps prevent chipping.
- Gentle Use: Treat your nails carefully. Avoid using them as tools to pick or pry things open.
- Top Coat Refresh: Every few days, apply a new layer of top coat. This can extend the life of your nail art.
- Quick Fixes: For small chips, use a fine brush to apply a tiny amount of polish. Then, apply top coat.
- Professional Touch-ups: If your nail art is intricate, consider getting touch-ups from a nail artist.
Remember, the longevity of your nail art also depends on the quality of products used and the precision in application when learning how to make nail art. By following these maintenance tips, your nail art can remain stunning longer.
Conclusion: Unleashing Your Creativity
As we reach the end of our guide on how to make nail art, remember creativity is key. Every tool and technique we’ve discussed serves as a stepping stone to expressing your own unique style. From choosing vibrant colors to adding three-dimensional embellishments, every design reflects a part of you. Don’t be afraid to try new ideas or combine techniques for something truly special.
Practicing the basics can open up a world of possibilities. Transform simple designs into intricate masterpieces as your skills grow. Above all, enjoy the process. The beauty of nail art lies not just in the finished look but in the joy of creation.
Nail art is not only about following trends; it’s about setting them. Use the tips and lessons from this guide to craft stunning designs that turn heads. Share your art, inspire others, and keep pushing the boundaries of what’s possible with a bit of polish and creativity.
So, pick up your brushes, dotting tools, and polishes, and let’s see where your imagination takes you in the world of nail art!