Introduction to Nail Art
Nail art is an exciting way to express one’s personal style and creativity. It’s a fun beauty practice that involves painting, embellishing, and decorating nails, turning them into tiny canvases for artistic expression. Learning how to do nail art opens up a world of endless designs, patterns, and opportunities to showcase one’s artistry. Whether you’re a beginner looking to experiment with simple designs or an enthusiast aiming to master intricate patterns, this guide offers step-by-step instructions to help you dive into the nail art scene.
In this comprehensive guide, we’ll cover everything from the basics, such as choosing the right polish, to the advanced techniques that require gels and acrylics. With the right tools, a steady hand, and a bit of patience, you can transform your nails into stunning art pieces.
To begin your journey into nail art, start with understanding and gathering the essential tools and materials needed to create your desired designs. This initial step is crucial as it lays the foundation for your nail art success. Let’s embark on this colorful and creative adventure together!
Essential Tools and Materials for Nail Art
Before diving into the colorful world of nail art, it’s important to gather the right tools and materials. Think of your nail art kit as an artist’s palette, where each tool plays a specific role in bringing your vision to life. A good setup not only makes the process easier but also ensures that your designs come out just as you’ve envisioned them. When considering how to do nail art, start with these essential items.
Choosing the Right Polish
Choosing the right polish is paramount in nail art. Look for high-quality nail polishes that offer a dense pigment for full coverage and a long-lasting finish. Quick-drying formulas can be a boon for impatient artists, but be aware they may require a quicker workflow. You’ll want a range of colors to match your creative ideas, as well as a few specialty polishes with glitter, matte, or metallic finishes for added flair. Remember, the right polish can make or break your design.
Brushes and Tools for Detailed Designs
For those intricate designs and precise lines, standard polish brushes won’t do the trick. You’ll need a set of nail art brushes with various tips — flat, angled, and pointed — to control where and how the polish goes onto your nails. Dotting tools are also a staple for creating polka dots or tiny details. Other helpful tools include striping tapes for straight lines, stamping kits for patterns, and sponges for gradient effects. Investing in these tools will expand your capabilities and refine your nail art skills.
Preparing Your Nails for Art
Before you dive into creating your nail art masterpieces, proper preparation of your nails is essential. This step is the foundation for a long-lasting and professional-looking manicure. Having clean, well-shaped nails not only makes your nail art look better but also allows the polish to adhere properly and last longer.
Cleaning and Shaping
Start by thoroughly cleansing your nails to remove any oils, dirt, or remnants of old nail polish. A gentle nail polish remover can do the job without stripping your nails of their natural moisture. After cleaning, shape your nails. Whether you prefer a rounded, square, or almond shape, use a fine-grit nail file to sculpt your nails gently. Avoid sawing back and forth, which can cause splits or breaks. Instead, file in one direction to achieve a smooth edge.
Base Coat Application
Applying a base coat is the next crucial step in preparing your nails for art. The base coat acts as a protective layer between your nail and the polish, helping to prevent staining from colored polishes. It also provides a smooth surface for better polish application. Make sure the base coat is fully dry before you proceed with your nail art. This could take a few minutes, but it’s a wait worth having for the best results.
Techniques for Beginners
Once your nails are prepped and ready, it’s time to start with some basic techniques. For those new to nail art, beginning with simple patterns and strokes is the way to go. These techniques lay the groundwork for more advanced designs in the future and help you get comfortable with handling the brushes and tools.
Simple Patterns and Strokes
Creating simple patterns and strokes is a great way to practice your nail art skills. Start with dots, stripes, or simple floral designs. Use your dotting tool to make uniform dots or end of a brush handle for larger ones. Practice making straight lines with a thin brush or striping tape. Experiment with different brush strokes to create leaves, petals, or abstract patterns. Play with colors, combine them, and see what new designs you can come up with. Remember, the key is to take your time and have a steady hand.
Using Stickers and Decals
For an even easier way to add art to your nails, try using stickers or decals. They are perfect for beginners and can add a professional touch to your manicure. Apply a sticker or decal on your nail and press down firmly. Make sure to apply a top coat to seal it in place. Stickers and decals come in various shapes, sizes, and designs, offering endless possibilities to embellish your nails. They are a quick way to add intricate details without requiring a steady hand or drawing skills.
Advanced Nail Art Techniques
With the basics mastered, it’s time to explore advanced nail art techniques. Delving into complex patterns and the use of gels and acrylics can elevate your designs to professional levels. This section focuses on pushing your creativity and skill—the aim is to craft nail art that truly stands out.
Creating Complex Patterns
Advancing in nail art means embracing more complex patterns. Here are a few tips:
- Practice Layering: Combine different patterns. Start with a simple base and add more detailed layers.
- Use Negative Space: Create designs that incorporate your natural nail color as part of the art.
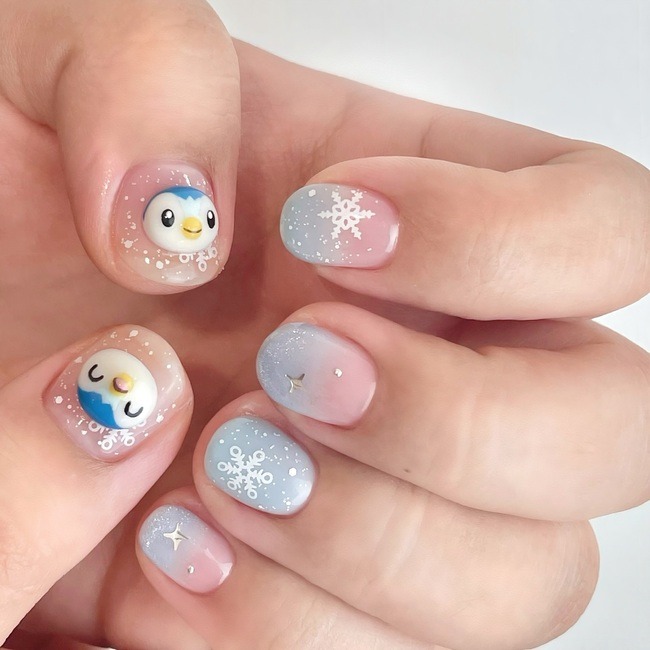
- Experiment with Textures: Mix matte and glossy finishes or add 3D elements like rhinestones.
Remember, complex does not mean cluttered. The beauty of complexity lies in the harmony of its parts. Plan your designs, maybe sketch them out before starting, and take your time executing each element.
Working with Gels and Acrylics
Gels and acrylics open up a new realm of possibilities:
- Gels: They offer long-lasting wear and a glossy finish that doesn’t fade. Apply them with care, cure under a UV light, and watch your designs last weeks.
- Acrylics: Use them to craft extensions or 3D art. Acrylics require practice, as they set quickly, so work with speed and precision.
Both gels and acrylics will require additional accessories, like a curing lamp for gel polishes and a set of acrylic liquids and powders. Always follow safety guidelines when handling these products, and ensure good ventilation in your work area.
Mastering advanced techniques is about patience and practice. Don’t be afraid to experiment, learn from mistakes, and rejoice in your progress as you learn how to do nail art that captures attention and admiration.
Finishing Touches
After mastering the art of creating beautiful nail designs, it’s crucial to ensure they last as long as possible. The finishing touches of your nail art play a significant role in both the look and longevity of your manicure. By applying a top coat correctly and maintaining your nails, you can enjoy your nail art for longer periods. Let’s dive into the best practices for sealing and maintaining your nail artwork.
Top Coat for Longevity
Applying a top coat is essential for protecting your nail art. It acts as a shield against chipping, peeling, and fading. Choose a high-quality top coat for a glossy finish and enhanced durability. Make sure the top coat covers the entire nail surface, including the tips, as this area is more prone to chipping. Allow the top coat to dry thoroughly. This can take a few minutes but will ensure your nail art is set properly and lasts longer.
Maintenance Tips
Regular maintenance is key to keeping your nail art looking fresh. Here are a few tips:
- Moisturize Regularly: Keep your hands and cuticles moisturized. Dry hands can lead to chipped polish and damaged nails.
- Wear Gloves: When doing household chores, especially those involving water or harsh chemicals, wear gloves to protect your manicure.
- Avoid Harsh Activities: Be mindful of activities that can chip your nail polish, like typing aggressively or opening cans.
- Touch-ups: If you notice a chip or scratch, apply a small amount of the same polish and top coat to fix it.
- Regular Top Coat Reapplication: Refresh your top coat every few days to maintain gloss and protection.
By following these guidelines, it will not only look stunning but will also stand the test of time. Enjoy your beautiful, long-lasting nail designs!
Resources and Inspiration
Seeking inspiration is crucial in mastering how to do nail art. Beyond practice, resources that spur creativity and provide new ideas are invaluable. In this section, we explore where you can find plenty of inspiration and guidance to enhance your nail art skills.
Online Tutorials and Communities
Online tutorials are great for learning new techniques. Websites like YouTube offer countless video tutorials for every skill level. These videos often provide step-by-step instructions making it easier to follow along. Additionally, joining online communities dedicated to nail art can provide support and inspiration. Platforms like Instagram and Pinterest are full of creative nail art designs shared by artists from around the world. Engage with these communities to exchange tips, trends, and techniques.
Books and Magazines
For more in-depth knowledge, books and magazines about nail art are invaluable. They often contain high-quality images of nail art, detailed tutorials, and profiles of professional nail artists. These resources can provide a deeper understanding of different styles, the history of nail art, and more sophisticated techniques that might not be fully covered in online tutorials. Libraries, bookstores, and online shops offer a range of titles from beginner guides to advanced professional texts.