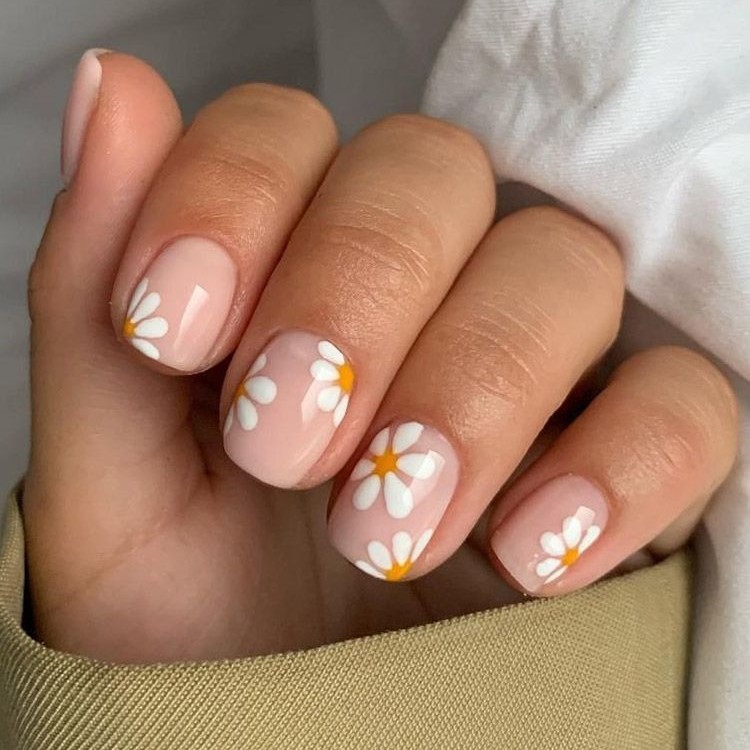
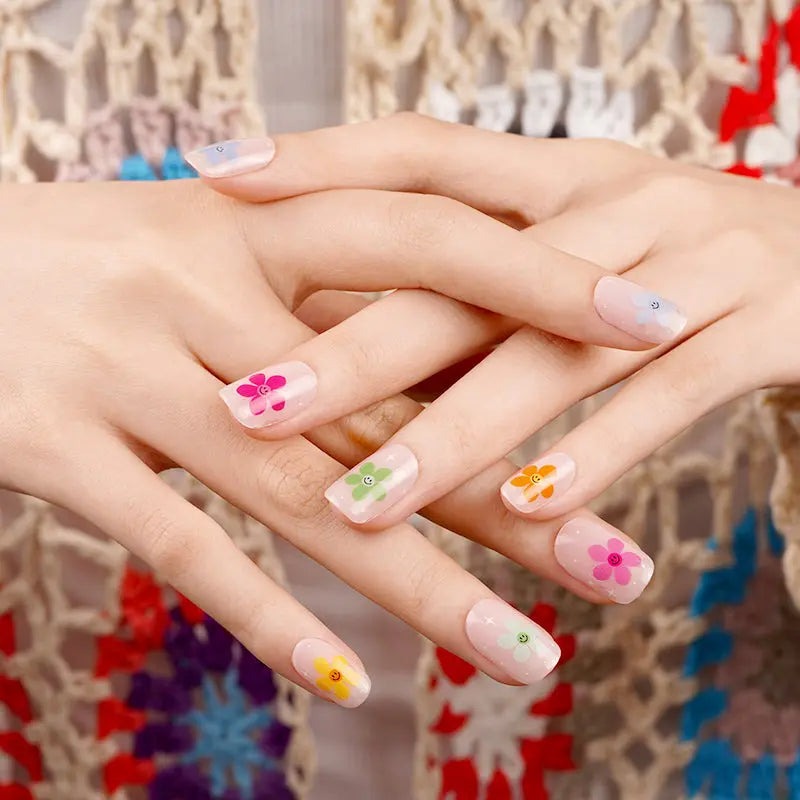
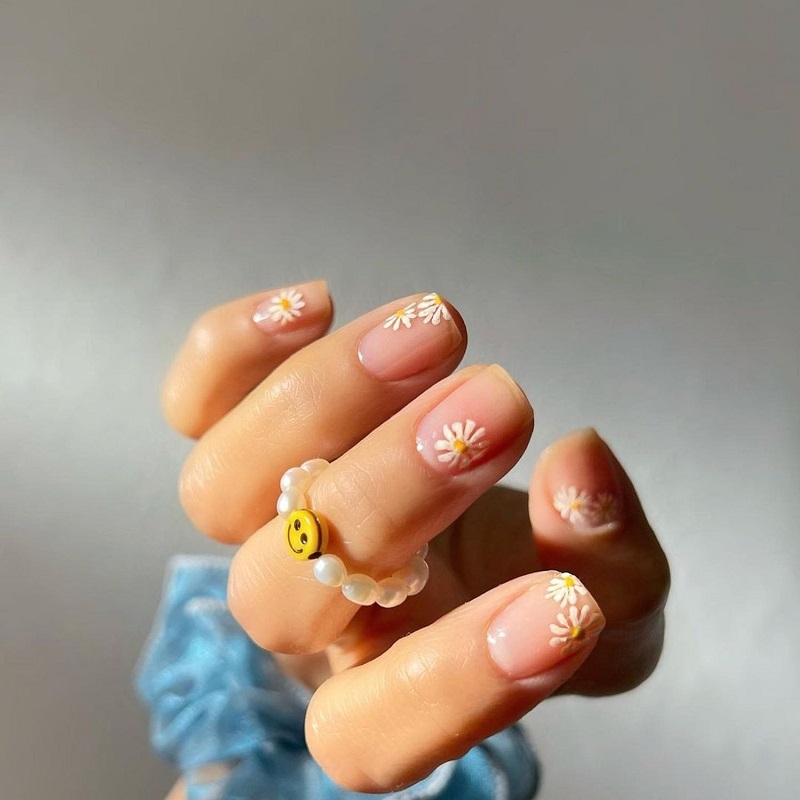
If you’re looking for a fun and cheerful way to decorate your nails, learning how to do daisy nail art is an excellent choice. Daisy nail art is not only adorable but also relatively easy to create. This guide will provide you with all the essential steps and tips to achieve beautiful daisy nails that are perfect for any occasion.
Introduction to Daisy Nail Art
Daisy nail art is a vibrant and playful design choice. It’s perfect for those who love floral patterns and want to add a touch of spring to their look. The design often features the classic white and yellow daisy, but the possibilities for creativity are endless. Learning how to do daisy nail art requires patience and practice. Whether you’re a complete beginner or an experienced nail artist, daisy designs can add a fresh element to your nail art repertoire. In this beginner-friendly tutorial, we’ll explore the essential tools and materials you’ll need and provide a step-by-step guide on how to create your own daisy nail art. We’ll also share tips for crafting perfect daisy petal shapes, incorporating color variations, and ensuring your art lasts with finishing touches and proper maintenance. Let’s dive in and get started on your journey to mastering daisy nail art.
Essential Tools and Materials
Before diving into how to do daisy nail art, let’s gather the necessary tools and materials. Quality and the right selection will make the process smoother and the end result more stunning.
- Nail polish: You’ll need white and yellow for the classic daisy look, plus any other colors you like.
- Base coat: To protect your nails and ensure the polish adheres well.
- Top coat: A clear polish for sealing in your design and adding shine.
- Dotting tool: For creating small, precise dots that form the center of your daisies.
- Fine brush: Essential for drawing delicate petal shapes accurately.
- Nail polish remover: To clean up any mistakes and perfect the edges of your art.
- Cotton swabs and pads: For applying remover and cleaning tools.
Gather these tools and materials and you’ll be all set to create beautiful nail art. Ensure each tool is clean and in good condition to achieve the best results.
Step-by-Step Guide to Creating Daisy Nail Art

Creating daisy nail art is a fun way to brighten up your manicure. Here’s a simple guide for beginners to follow:
- Start with clean, dry nails. Apply the base coat to protect your nails and provide a surface that will help the polish stick better.
- Once the base coat dries, paint your nails with a background color of your choice. This could be anything from a soft pastel to a vibrant spring green. Let it dry completely.
- Dip your fine brush into white nail polish. Paint five or six petal shapes radiating out from a single point where the center of the daisy will be. The petals should be slightly curved and come to a point, like teardrops.
- Clean the brush on a cotton pad soaked with nail polish remover before switching to yellow polish. Using your dotting tool, place a dot of yellow at the center of the petals. This creates the look of a daisy center.
- Allow the daisy design to dry fully to avoid smudging. If you’re adding more daisies to your nail, ensure there’s enough space between them to prevent the designs from overlapping.
- Once you’re satisfied with your daisy designs, and they’ve dried, apply a top coat. This will seal your art, add shine and ensure your daisy nail art lasts longer.
Be patient between each step to allow proper drying time. If you rush, the layers might mix or smudge, which could ruin your design. Practice makes perfect, so don’t worry if your first few attempts aren’t flawless. Keep at it, and soon you’ll know how to do daisy nail art like a pro.
Tips for Perfecting Daisy Petal Shapes
Creating the perfect petal shapes is crucial in daisy nail art. Here are some tips to help you master the technique:
- Start simple: If you’re new to nail art, begin with a simple design. Try making one daisy before adding more.
- Use a guide: Consider using a dot as a guide for where the petals should point. This can help keep the shape consistent.
- Steady hand: To draw smooth lines, rest your hand on a stable surface. Keep your brush movements gentle and controlled.
- Practice on paper: Before you start on your nails, practice drawing daisies on paper. It helps build confidence and skill.
- Uniform size: Aim for petals that are similar in size. This gives a neat and professional finish to your daisy nail art.
- Symmetry is key: Even if petals are not perfect, symmetry can still give an overall balanced and pleasing look.
- Embrace imperfections: Small variations can add character to your nails. Don’t stress too much about making everything uniform.
Remember, perfecting petal shapes takes practice. Don’t get discouraged if your first attempts aren’t quite right. With time and patience, you’ll learn how to do daisy nail art with beautifully shaped petals.
Incorporating Color Variations in Daisy Nail Art

While the classic white and yellow daisy is timeless, adding color variations can make your nail art more unique. Here’s how to bring a splash of color to your daisy designs:
- Experiment with petal colors: Instead of white, try using different shades for the petals. Soft pinks, purples, or blues can create a delicate look.
- Vary the center color: Go beyond the traditional yellow by using orange, red, or even green for the daisy centers to add contrast.
- Ombre petals: Create a gradient on the petals by blending two colors. Start with a lighter color at the base and fade into a darker tip.
- Add colorful backgrounds: Choose a contrasting nail polish color for your base to make the daisies pop. Consider pastel shades for a subtle effect or bright colors for a bold statement.
- Multi-colored daisies: For an even more dynamic look, paint each petal a different color. This gives a playful and vibrant vibe to your design.
When incorporating color variations, remember to let each color dry before applying the next. This prevents the colors from bleeding into each other. With these tips, you’re ready to elevate your daisy nail art with beautiful color combinations.
Finishing Touches: Top Coats and Sealants
After mastering how to do daisy nail art, it’s essential to apply finishing touches. These ensure your design looks polished and lasts longer. Here’s what you need to know about top coats and sealants:
- Choose the right top coat: Opt for a high-quality top coat. It should offer shine and protection against chipping.
- Apply evenly: Cover the entire nail surface with the top coat. This prevents your daisy nail art from peeling off.
- Allow sufficient drying time: Let the top coat dry completely. Drying time can vary, so be patient. Rushing can lead to smudges.
Using a sealant is optional but beneficial. It gives an extra layer of protection. A good sealant can also enhance the appearance of the colors in your daisy nail art.
- Select a suitable sealant: Look for those specifically designed for nail art. They should bond well with nail polish.
- Apply a thin layer: Keep the layer light to avoid altering the design’s appearance.
- Dry thoroughly: Similar to the top coat, ensure the sealant dries fully.
Remember, these products work together to extend the wear of your nail art. They defend against elements like water and daily wear. Using both, your daisy nail art will not only look better but also last much longer.
Maintenance and Aftercare for Daisy Nail Art
To ensure your daisy nail art stays as fresh and vibrant as when you first painted it, proper maintenance and aftercare are key. Here are some helpful strategies:
- Avoid Harsh Chemicals: Keep your hands away from cleaning products and harsh chemicals. Wear gloves when doing tasks like washing dishes or cleaning.
- Moisturize Regularly: Apply hand lotion or cuticle oil to keep the skin around your nails healthy. This also prevents chipping.
- Touch Ups: When edges start to wear, do quick touch-ups. Apply a tiny bit of the same color polish to fix any chips.
- Be Mindful of Activities: Be cautious of activities that can chip or damage your nail art, such as typing vigorously or opening cans.
- Use Gloves for Chores: Protect your hands and nails by wearing gloves during chores that are tough on your hands.
- Nail Hardener: Consider using a nail hardener to provide extra strength to your nails and help the art last.
- Gentle Removal: When it’s time to remove your daisy nail art, use a gentle nail polish remover. Avoid scraping or peeling the polish, as this can damage your nails.
By following these maintenance and aftercare tips, you can enjoy your beautiful daisy nail art for a longer period. Remember, the longevity of your nail art depends on how well you take care of it after the application.
Inspiration: Creative Ideas for Daisy Nail Art Designs

Daisy nail art can showcase your creativity. Here are some unique ideas to try out:
- Daisy Chain Around the Nail: Create a continuous line of daisies around your nail edge. It looks like a floral bracelet.
- Mixed Sizes: Mix large and small daisies for a playful and dynamic effect. It adds depth to your design.
- Accent Nail: Paint a single nail with a daisy design. Keep the rest in a solid color. This highlights the daisy effectively.
- Glitter Center: Replace the classic yellow center with glitter polish. It adds sparkle and a touch of glamour.
- Negative Space Design: Use the natural color of your nail as part of the daisy. Paint petals around untouched areas.
- 3D Effect: Attach tiny beads at the center of your daisies for a 3D effect. It looks stunning up close.
Each of these ideas can bring new life to your daisy nail art. Experiment and find which style suits you best. Remember, the key is to have fun while expressing your creativity. With each design, you learn how to do daisy nail art more expertly.