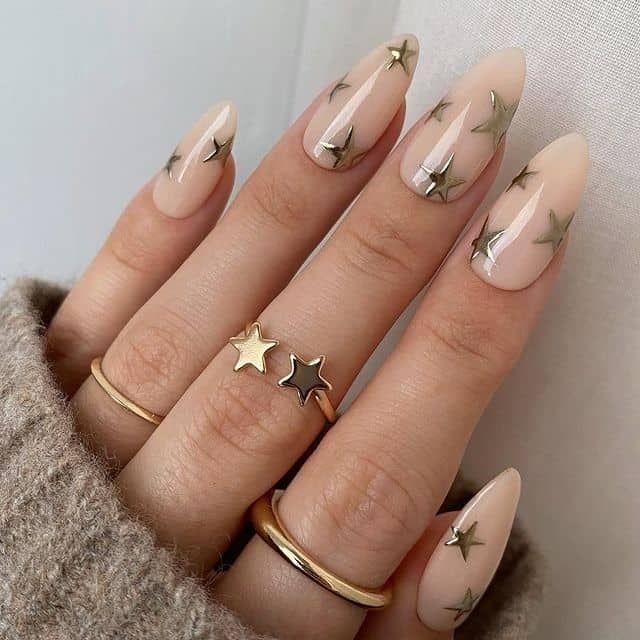
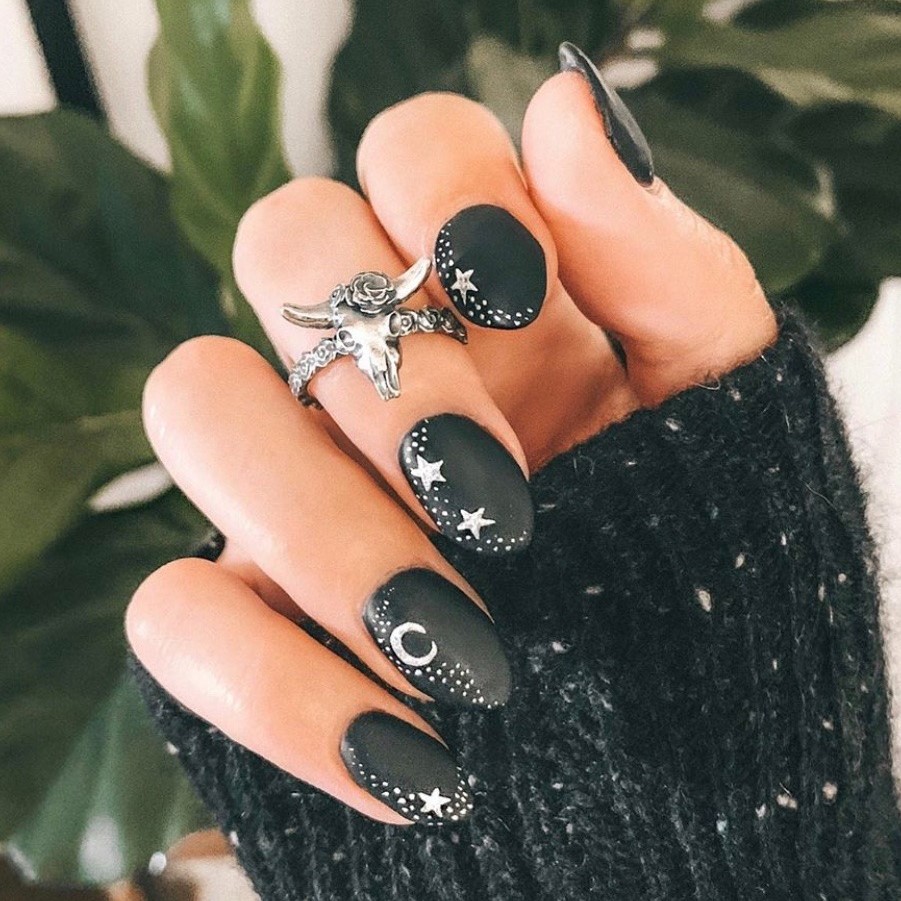
Nail art has become a popular form of self-expression, with countless designs and techniques available for enthusiasts to explore. Among these, star nail art has gained significant attention due to its striking aesthetic and versatility. Understanding how to do nail art can open up a world of creativity, allowing you to add a celestial touch to your manicure. In this guide, we will delve into various techniques, tools, and tips for achieving stunning star nail art that can be adapted for any occasion. Whether you’re preparing for a festive celebration or simply wishing to elevate your everyday look, mastering nail art is an enjoyable process that can enhance your skills and boost your confidence in nail design.
Essential Tools for Star Nail Art

Before diving into how to do nail art, it’s essential to gather the right tools. A well-prepared workspace can make the process smoother and more enjoyable. Here are some tools you’ll need:
- Base Coat: This is crucial for protecting your natural nails and ensuring your nail polish adheres properly.
- Nail Polish: Choose your base color and a star-themed color palette. Popular colors include midnight blue, metallic gold, or shimmering silver, as they evoke the beauty of a starry night.
- Dotting Tool or Toothpick: These tools will help you create the star shapes with precision. You can use a dotting tool specifically designed for nail art, or simply use a toothpick if you’re in a pinch.
- Nail Art Brushes: Detail brushes can help you create fine lines and intricate designs, which are helpful when you’re trying to perfect your star patterns.
- Top Coat: Once you’ve finished your nail art, a top coat will help seal the design and add a glossy finish.
With these tools in hand, you’re ready to learn how to do star nail art!
The Process: How to Do Star Nail Art

Now that you have your tools ready, let’s break down how to do nail art step by step:
- Prep Your Nails: Start by cleaning your nails and pushing back the cuticles. Apply a base coat to protect your nails and help the nail polish adhere better. This step is crucial for ensuring your star nail art stays fresh and vibrant for as long as possible.
- Apply Base Color: Choose a base color that will complement your star art. For a nighttime sky look, a deep navy or black works beautifully but feel free to experiment with colors that resonate with your style. Apply two coats for an even finish, allowing the polish to dry between applications.
- Creating Star Shapes: Once your base color is completely dry, it’s time to create the stars. Using a dotting tool or toothpick, dip it into a contrasting color (like yellow or white) and carefully create small dots that form star shapes. For typical star designs, you can create a five-pointed star by dotting five points in a “V” shape around a central dot. Repeat this process until you’re happy with the number and placement of stars on your nails.
- Add Details: To make your star nail art pop, consider adding additional details. You can create smaller stars surrounding the larger ones or even add sparkles and glitter for extra flair. A small brush can help add fine lines or to enhance the edges of your stars.
- Finishing Touches: Once you’re pleased with your stars, allow the polish to dry completely before applying a top coat. This step protects the intricate designs and adds a beautiful shine to your nails.
Tips for Perfecting Your Star Nail Art
Learning how to do star nail art can take practice. Here are some additional tips to help you perfect your technique:
- Be Patient: Nail art requires patience and a steady hand. Don’t rush through the process; take your time to achieve the designs you want.
- Experiment with Colors: Don’t hesitate to use unconventional colors for your stars or base coat. Nail art is all about creativity, so feel free to mix it up!
- Use Nail Stencils: If you find it challenging to create perfect stars by hand, consider using nail stencils. They can help you achieve a more uniform look.
- Practice Makes Perfect: If your first attempt at nail art doesn’t come out as planned, don’t get discouraged. Keep practicing, and you’ll see an improvement in your skills.
Color Combinations and Design Options
Choosing the right color combinations can greatly influence the overall effect of your star nail art. For instance, dark blue or black polishes can mimic the night sky, providing a beautiful backdrop for bright gold or silver stars. Alternatively, pastel colors can create a playful and soft look, ideal for spring or summer styles. When considering how to do star nail art, think about the mood you want to convey. You can also play with gradients and ombres, transitioning from one color to another while placing stars at various points for a whimsical effect. Don’t shy away from mixing textures as well; matte finishes can accentuate glossy stars and vice versa, adding depth to your design. The possibilities are endless, and with some creativity, you can design nail art that truly reflects your personality.
Caring for Your Star Nail Art
Once you’ve successfully mastered how to do star nail art, it’s essential to take care of your masterpiece to ensure it lasts. Allow each layer of polish to dry thoroughly before applying the next to avoid smudging your designs. Applying a high-quality top coat will also help seal the design and add a glossy finish. Additionally, if your star nail art is intricate, consider using a gel top coat or gel polish for added durability. In terms of maintenance, try to avoid exposing your nails to harsh chemicals or frequent water immersion, as these can weaken the polish and lead to chipping. Remember to moisturize your cuticles to keep your nails looking healthy and vibrant. With proper care, your star nail art can shine bright for days.
Show Off Your Stunning Star Nails

Once your nails are complete and dried, it’s time to flaunt your beautiful star nail art! Here are a few ways to showcase your creation:
- Social Media: Share your nail art on platforms like Instagram or Pinterest. Use hashtags to connect with other nail art enthusiasts.
- Nail Art Competitions: Consider entering your design into local or online nail art competitions to challenge yourself further and gain recognition for your work.
- Incorporate into Your Style: Match your star nail art with outfits or accessories. The versatility of star designs can enhance any look, making it perfect for various occasions.
Celebrating your finished nail art is an integral part of the creative process. Not only does it showcase your skills, but it also inspires others interested in learning how to do star nail art.
Conclusion and Inspiration
In conclusion, learning how to do nail art is not only fun but also allows for immense personal expression. With the right tools, techniques, and color choices, anyone can master this art form. Whether you’re prepping for a special event or just want to brighten up your day, star nail art provides endless possibilities for creativity. Take inspiration from nature, art, or even your mood to come up with unique designs. Consider exploring social media platforms for ideas and tutorials from other nail art enthusiasts. Remember, the most important aspect of any nail art project is to enjoy the process and express yourself. With practice and patience, you’ll soon become adept at creating stunning star nail art that dazzles and delights.